How to Tear Down a Shed
Dismantling a shed that's seen better days is a sure-fire way to make your yard more inviting.
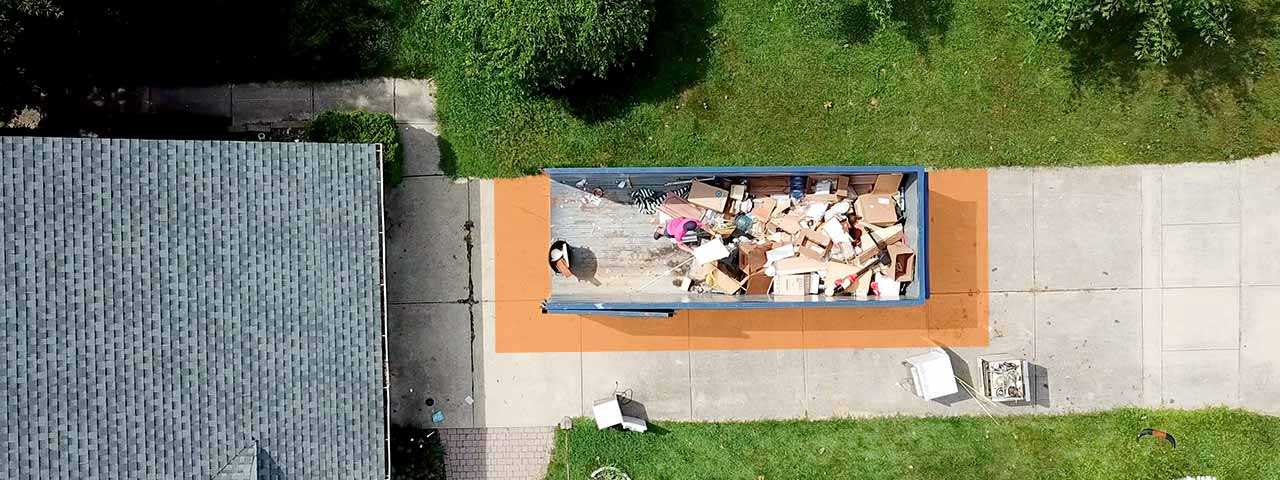
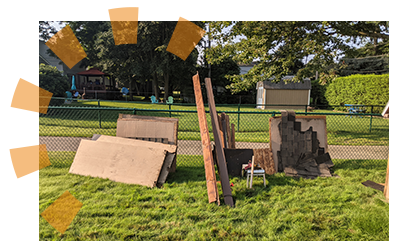
Make cleanup a breeze with a roll off dumpster:

7-Step Shed Removal Guide
Sheds aren’t built to last forever, and eventually you have to knock them down. Whether it’s getting too small for your storage needs or becoming an embarrassing eyesore, shed removal is an inevitable project (but not a difficult one). Don't stress about the differences in dissembling a wooden shed vs. a metal shed. Our step-by-step guide will go over the best way to demolish both types.
Shed Demolition FAQs
How do I get rid of shed scraps?
Demolishing a shed leaves you with a large pile of rubbish to take care of. Come up with a disposal plan before you get to work to help eliminate stress at the end of your project. You'll most likely find that a roll of dumpster is the best solution.
A dumpster is a good catch-all for projects with a lot of debris variety, from shingles and sheet metal to wooden beams and nails.
Ready to rent a dumpster? Order online today.
How much does it cost to tear down a shed?
As a base-line, consider roughly $200 as the minimum for a DIY shed demolition. As you go through the list in the estimate shed demolition and removal costs section below, note issues that may come up that will increase the base cost. The national average to hire someone to tear down a shed is closer to $1,500, or $10.50 per square foot.
Do I need a permit to tear down my shed?
Each city has different ordinances in place, but a permit is commonly required when a structure is being built, changed or demolished. Prior to tearing down your shed, it’s a good idea to reach out to your city government to see if a permit is needed.
Order a Dumpster Online
Shopping after hours? Too busy to make another call? Book the dumpster you need, when you need it. Order your dumpster online 24/7.
How to Demolish a Shed By Hand

1. Prep for the Demolition
A shed demolition plan helps you be successful. Knowing if you need a permit from your city, what tools to use, having a disposal plan and understanding general shed demolition costs will go a long way to making the project safe and easy.
Estimate Shed Demolition and Removal Costs
There’s no magic answer to the cost of removing a shed. For DIY shed removal, your only costs will be for tools, materials, permits and disposal. If you’re considering hiring someone, there are a few factors that can adjust the price:
- Location: Where is the shed on your property? Is it easy to access or are there lots of obstructions or hazards? The more accessible the area, the cheaper the job will be.
- Material: What is your shed made of? Metal, wood or stone? Different materials will cost more or less to tear down, with heavier materials costing more due to disposal fees.
- Condition: If a shed is in great condition, it will take more effort to tear down, which increases the cost. While a decaying shed can be cheaper to remove, the removal price will be higher if it poses a danger to those working on it.
- Attachments: Consider how the shed is attached to the ground. Is it simply built on the ground or a concrete slab? Does it use electricity, water and/or gas? The more attachments, the more expensive the shed demolition and removal cost will be.
Gather Tools and Materials
You won’t necessarily need any heavy-duty or special tools to knock down a shed (unless you want to use them). The bulk of the tools needed are things that come in your standard tool kit:
TOOLS | SAFETY GEAR |
|---|---|
Ladder | Hard hat |
Adjustable wrench | Goggles |
Pliers | Heavy-duty gloves |
Screwdriver | Heavy-duty boots |
Sledgehammer | Long-sleeve shirt |
Hammer | Durable pants |
Chisel | |
Crowbar | |
Spare 2x4s* | |
Reciprocating saw* | |
Roofing shovel* | |
Dumpster* |
Need a dumpster to handle the mess?
Get a Price and Place Your Order Give Us a Call to Learn More
2. Clean Out the Shed
An empty shed makes tearing it down much easier. That doesn’t mean you have to throw everything out, but you do need to move it out of the way. Make sure that anything you'd like to keep is stored somewhere safe to avoid damage as you start your shed demolition.
This is also a great time to sort through unneeded or broken items. Three piles should do:
- Donate/recycle
- Hazardous disposal
- Trash

Look Out for Hazardous Items
Certain things in your shed that you may want to get rid of, such as propane tanks and pesticides, are considered household hazardous waste. These items are prohibited in landfills and need to be disposed of separately. Check with your city government to see when they have a hazardous waste collection event.
Salvage Items to Donate or Recycle
If you want to donate or recycle shed materials, consider their condition. There are companies that accept donated wood from your shed for refurbishment and reuse. However, if the wood is too decayed or damaged during removal, it will not be accepted. You can also recycle metal sheets from your shed, but rust may make them unacceptable.
Note anything that could be hazardous as you start to disassemble your shed, such as nails in studs used as hooks, broken window panes and unstable shelves. Remove what you can now and remember the rest for later.
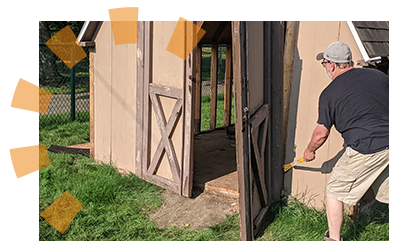
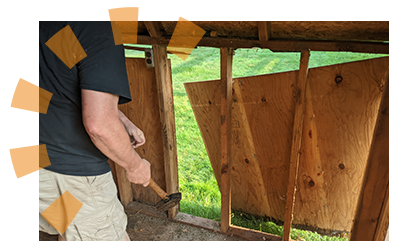
3. Dismantle Door and Windows
Before you get to tearing down your shed, remove any wall fixtures, shelving or storage accessories. It’s as much for safety as it is for making the walls lighter for later steps.
Once that's done, move onto door and window removal:
Remove the Door
Simply use your screwdriver to pop the door off the hinges, or take the screws out and remove the hinges entirely. You can also remove the side of the hinge still on the frame (optional).
Take Out Windows
By removing windows now, it helps prevent injury when you get further in the demolition process. Get rid of any caulking and trim around the window using a combination of your hammer, chisel and screwdriver, then pry out nails or screws holding the window in place and slide the window out.
Pro Tip: To help avoid the window panes breaking or making a mess if they do, use contact tape or a heavy masking tape on both sides. If the pane breaks, the pieces will stay in place.
4. Tear Off Shed Roof
Whether you’re working on tearing down a wooden shed or a metal shed, the roof is the place to start. Note that as you remove parts of the shed, the structure will become increasingly unstable. That’s why it’s best to work from top to bottom for safe demolition.
Keep in Mind: Most shed removal projects will require you to use a ladder to work on the roof. If you are uncomfortable with heights or don’t have a spotter nearby, consider hiring a pro.

Never stand on the sheet you are removing. Once the final fastener has been removed, it will slide off the roof and take you with it.
Remove Shed Roof Shingles
-
Start at the peak of the roof. Remove the shingles using a hammer and pry bar, or a roofing shovel. Throw removed shingles into your dumpster as you go.
-
Pull off the underlayment and sheathing with a pry bar so that the rafters are exposed. To find the seam between sheathing boards, remove some of the underlayment.
-
Pry apart the rafters with a hammer and crowbar. You may need to remove nails or screws first. If the rafters are not coming apart easily, use a reciprocating saw and cut near the points where the rafters connect to the walls.
-
Toss remaining sections of the roof into your dumpster.
Remove Metal Roof Panels
-
Start at the peak of the roof. Yank out any nails or screws that are holding the sheet metal in place. Repeat until all sections of sheet metal have been removed.
-
If there are rafters under your metal roof, pry them apart with a hammer. You may need to remove nails or screws in order to do this. If the rafters are not coming apart easily, use a reciprocating saw and cut near the points where they connect to the walls.
-
Toss the debris into your dumpster.
Not sure how much it will cost to dispose of your shingles? Check out our shingle weight calculator to get an estimate.
5. Knock Down the Shed Walls
With the roof removed, it’s time to work on the walls. You’ll want to start with the wall that had the door in it, as it is the least structurally sound. From there, follow the steps below on how to tear down the walls of a wooden shed or a metal shed.
For a Wooden Shed
- If you want to save the siding for reuse or recycling, start by using your hammer to pry all attachments from the shed frame. Once completed, gently knock the siding from the inside until it comes off. Repeat for all four sides.
- Remove any connections to the floor using your adjustable wrench and pliers. If floor connections can’t be removed and you don’t plan on reusing the floor, use your reciprocating saw to cut through the frame on each side of the fastener. Otherwise, use your sledgehammer to hit the frame and force the connection out.
- Find and remove any connection to other walls.
- Push on the wall frame until it falls down. Be sure not to use too much pressure and fall with it. If you don’t feel safe, use your sledgehammer to hit the frame until it falls.
- Remove the knocked down wooden shed wall and dispose of it.
- Repeat steps for the remaining walls, keeping in mind the structure will become less stable as you continue and may need to be aided by temporary support.
For a Metal Shed
- Remove any connections to the floor using an adjustable wrench and pliers. If floor connections can’t be removed, use a sledgehammer to lightly hit the walls outward, which should force the connection out.
- Find and remove any connections to other walls, keeping in mind the nails, screws or bolts could be on the outside of the shed.
- Use your sledgehammer to knock the wall outwards and force it over if the wall doesn’t automatically fall down.
- Remove the dismantled shed wall from the area and dispose of it.
- Repeat steps for the remaining walls, keeping in mind the walls will become less stable as you continue and may need to be aided by temporary support.

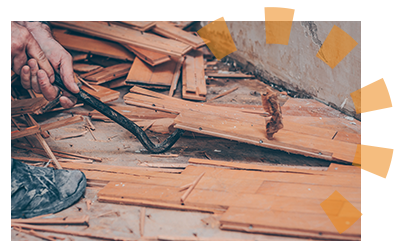
6. Demolish Shed Flooring
If your shed has flooring, use a crowbar to pry up the planks. If your flooring is on legs and you feel comfortable, use a reciprocating saw to cut through the floor and speed up the process. Once the floorboards have been removed, see if the legs have fasteners to the ground and remove them.
If your shed doesn’t have a floor, there may still be a concrete slab. If you plan on reusing the concrete slab, you’re done. If you want to remove the concrete, check out our concrete patio removal guide for tips.
Keep in Mind: As you remove individual walls, the remaining ones will become less stable. Consider having a friend or two stabilize the wall as you work. If you are working alone, have 2x4s handy to create temporary supports by digging a small hole in the ground and set the 2x4 at a 45-degree angle to the shed wall. You can also do the same on the inside by bolting the 2x4 to either the shed floor or the remaining wall.
7. Shed Cleanup
After you’ve finished disassembling your shed, you should have three piles to work with: Donate/recycle, hazardous disposal and trash. If you’ve been throwing debris away as you work, the garbage pile should be pretty small. Now’s the time to throw any remaining debris into your roll off dumpster as you clean the jobsite. And if you have any items to recycle or maybe some hazardous waste to dispose of, remember to find a local disposal option so you don't incur fees from the landfill.
An Open Yard Awaits
Now that you’ve successfully demolished your shed, there are plenty of options for your yard. Maybe you want to plant a garden, build a fire pit or put a new shed in its place. Whatever you choose, enjoy that the space in your yard is the result of your hard work.
Still working to make your backyard the best it can be? Check out more DIY Backyard Projects for inspiration or our Yard Cleanup Guide to learn even more ways to open space in your yard.
Other Sources
How Much Does It Cost to Tear Down a Shed. (2021, June 09). Retrieved from RKS Services Group
What Do You Think?
Have thoughts on diy demolition projects? We're listening. Head over to Twitter or Facebook,
and use #dumpstersblog to join the conversation.


