How to Install Vinyl Plank Flooring
Vinyl plank flooring is more popular than ever with its easy installation and variety of finishes. Learn how to install it with our beginner's guide.
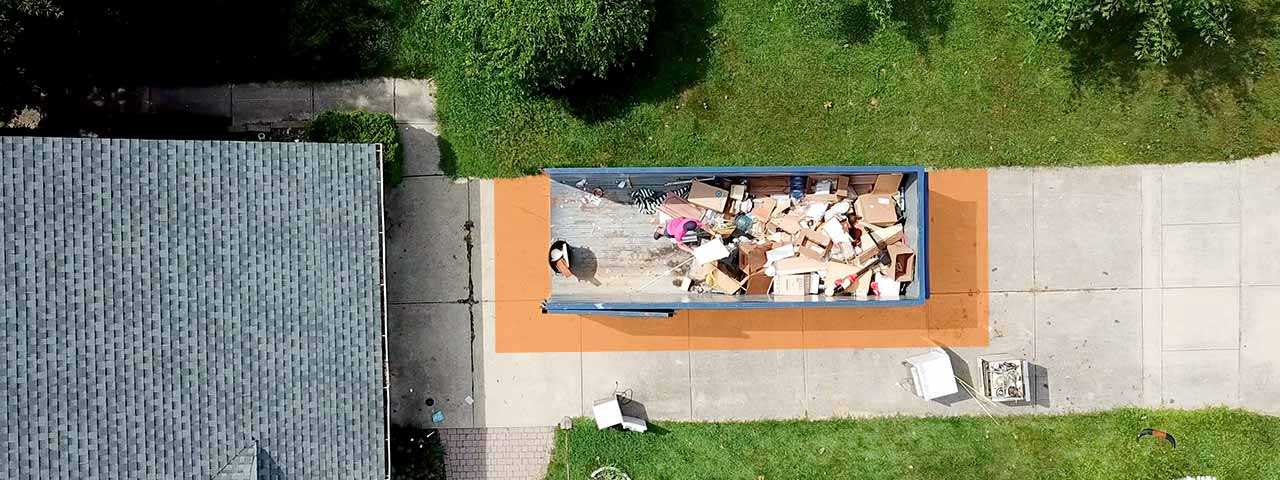
Make cleanup a breeze with a roll off dumpster:

Tips for Installing Vinyl Plank Flooring
Luxury vinyl plank (LVP) has steadily gained more traction since its introduction to the public in 2009 — and it is easy to see why. If you choose to install it without a contractor, you’ll have control over the layout and color options and the process usually takes less than a day. Plus, LVP is quiet, easy to clean, and is completely waterproof, making it a great option if you have kids or pets.
What Is the Average Cost to Install Vinyl Plank Flooring?
The average cost of vinyl plank flooring is $2 to $7 per square foot. To have someone install your vinyl flooring averages an additional $3 to $10 per square foot in labor costs. Your total cost will depend on a few factors:
- The type of vinyl flooring
- Removing old flooring
- Subfloor replacement
- Where you’re installing vinyl flooring
Vinyl Plank Flooring FAQs
What is vinyl plank flooring?
Vinyl plank flooring or luxury vinyl is a much thicker version of traditional vinyl flooring. It’s made in long planks with a modified tongue and groove connection that lock together for easy installation. Plus, VPF is sturdy against moisture and spills.
Do I need a dumpster to install vinyl plank flooring?
While a dumpster may not be as necessary during the installation phase, if you're removing an old floor beforehand a dumpster is vital. It helps keep the work space tidy and safe from trip hazards, old nails and discarded flooring materials. Plus, if you have to cut down any planks during installation, the odds and ends can just be tossed into the dumpster as well.
Ready to get a dumpster? Place an online order today.
Is vinyl plank flooring easy to install yourself?
Vinyl plank flooring is one of the easiest DIY flooring options to install. It is easy to cut, requires no bonding to the subfloor below, and snaps together at the ends and edges.
Should I install floating vinyl plank flooring or glue it down?
Floating floors are usually planks that click and lock together and get their name from the fact that the new floor rests on top of the old flooring. Putting something underneath them is optional if the homeowner wants more comfort or soundproofing. Glue-down floors are glued to underlayment or subfloor and are recommended if you're looking for more durability or are covering a large space.
How long does it take to install vinyl flooring?
It can take between two hours and two days to install vinyl flooring, but some types of vinyl flooring need a few days to acclimate to the temperature and humidity of your home. This prevents expanding and contracting of the material after the flooring is installed.
Do you need an underlayment for vinyl plank flooring?
Wondering what goes under vinyl plank flooring? The planks can be installed without an underlayment (floating) but adding underlayment like plywood can help compensate for imperfect subfloors or even keep your floor warmer if necessary.
Order a Dumpster Online
Shopping after hours? Too busy to make another call? Book the dumpster you need, when you need it. Order your dumpster online 24/7.
Where to Start Laying Vinyl Flooring
Thankfully, installing new vinyl flooring is easier than installing hardwood or tile. Many experts recommend beginning by preparing your space and making sure you have the appropriate tools to get the job done. Below you’ll find the tools you need, as well as step-by-step instructions to lay floors, from mapping out your flooring design to laying your final plank.
To begin, make sure your floor is level. If you plan on gluing the planks down or giving the floor an underlay, make sure your old flooring is torn out and your subfloor is appropriately cleaned and prepped. If you're opting to install underlayment, there are several options including foam, cork, plywood and more. The best underlayment for your vinyl plank flooring will depend on several factors, so be sure to do a little research on each to choose the best one for your needs.
Step 1: Gather Your Tools
Vinyl Plank Flooring Installation Tools
Tools | Supplies |
|---|---|
Utility knife | Pencil or chalk |
Pry bar | Measuring tape |
Rubber mallet | Nails |
Pliers | Carpenters square |
Fine-tooth saw | Straightedge |
Spacers (if necessary) | |
Level | |
Safety glasses | |
Knee pads |
Need a dumpster to handle the mess?
Get a Price and Place Your Order Give Us a Call to Learn More

Step 2: Plan Your Plank Flooring Layout
Vinyl plank flooring can be laid out in a variety of intricate or basic patterns. Make sure you know what pattern you would like to do before you lay your first plank. The more intricate the design, the more you should have mapped out. That way, you’ll know how to stagger your vinyl plank flooring to make it look how you want. If you do plan to stagger your flooring, just make sure the plank at the end of your first row is no less than six inches in length, and that the end of the first plank in your second row is six to eight inches away from the closest seam in row one.
Decide Which Direction to Lay Your Vinyl Plank Flooring
To lay your flooring in a basic pattern, design experts recommend starting from the most visible wall of the room from the entrance. Lay your planks so that they run from end to end, parallel against this wall. It’s recommended you start ¼ of an inch off the wall. Once you lay your planks parallel to the most visible wall, work outward toward the door. If you find that your vinyl planks don’t reach the other end of the room, you can either cut a plank to fit the space or rely on your baseboards to cover small gaps later.
Step 3: Prep the Floor
Before you start laying your LVP, it’s important your space is prepped and ready for the flooring. Here's how to prepare the room for your vinyl plank flooring installation:
- Remove Your Baseboards: Use your pry bar to carefully remove your baseboards. This step ensures that the flooring seamlessly blends with the walls and you aren’t left with any awkward gaps. Removing the baseboards will also prevent them from getting damaged when you are laying your floors. If the baseboards don't come off easily, try cutting through excess dried paint with a putty knife.
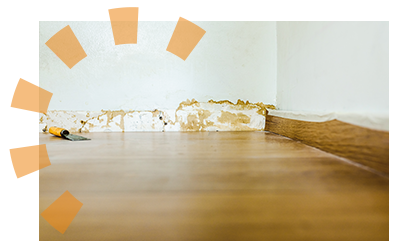
- Remove Old Flooring: Tear out any transition strips that separate different types of flooring and begin working to pull up any old flooring. If you are having a hard time a pry bar might help. Check out these guides to help remove your old flooring:
- Clean the Subfloor: Clean the floors and make sure your space is level and free of damage. If necessary, fill cracks in the subfloor with a concrete filler. Using a putty knife, run the material over any uneven spaces or gaps in the ground and sand them down after the filler dries to ensure a strong subfloor.
- Install Underlayment: If you opt for underlayment, now is the time to install it. Working from left to right, lay the floor padding in the direction you will be installing flooring planks and tape the pieces together before you start laying the flooring to keep the underlayment in place.
Safety Tip
Don’t try to sand down existing linoleum or vinyl flooring as it might be filled with asbestos. This is especially likely if the home was built before 1980, the flooring looks dirty or discolored or the flooring adhesive is black. If you're not sure about the contents of your existing flooring, you can always get it tested.
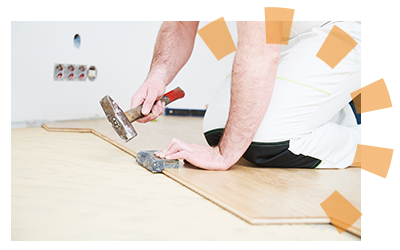
Step 4: Lay Your First Row
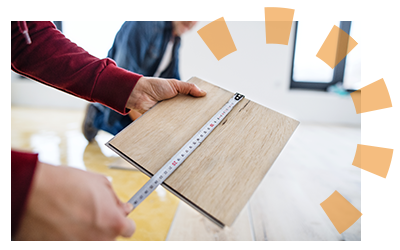
Now that you have your tools ready, flooring mapped out and a clean workspace — it’s time to lay your first row of planks. Begin by trimming off the short tongue edge of the first plank with a knife. Then, lay the first plank about ¼ inch from the wall. You can use spacers as you work to help mark the distance you need. Continue this process for the length of the wall.
Use your rubber mallet to gently tap on the ends of the plank so they click together. Always make sure to use your tapping block between the mallet and planks to protect your new flooring. Continue this process for the length of the wall.
Common Vinyl Plank Flooring Installation Questions
What do I do if a plank is damaged?
For small scratches, fix the damaged plank by cleaning the plank and applying vinyl flooring putty. Make sure to match the color of the putty to your floor. Then, sand the area so the putty blends in with the plank.
For major damage, remove the plank with a utility knife or by lifting the edges, depending on how you installed it. Measure and cut a new plank to fit the space, and apply adhesive to the new plank to stick it to the floor.
Why aren’t my planks locking together properly?
There are several reasons why your planks may not be locking together properly:
- There may be debris within the grooves of the planks.
- Your subfloor is uneven.
- The planks are damaged or aren’t properly aligned.
How do I fix uneven or wobbly planks?
For minor uneven planks, like loose edges, apply an adhesive to fix the loose plank. You can also use a hairdryer to heat the uneven area and apply pressure to put the plank back in place.
For more severe unevenness, you may need to remove and reinstall your flooring. Before removing your planks, be sure to check the evenness of the subfloor with a level first. If your subfloor is uneven, you can apply a self-leveling compound to level out the floor before installing your planks.
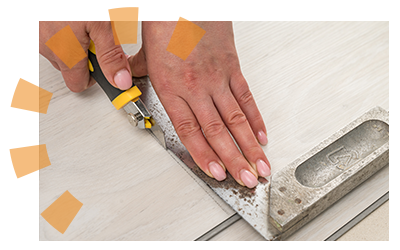
Step 5: Cut for Odd Spaces
Not all rooms are perfectly square, which can make laying a bunch of rectangle planks a little tricky. Here's how to cut your vinyl plank flooring for odd corners or spaces:
- Measuring out the angle you need to cut your plank.
- Score the plank using a utility knife and a carpenter square.
- Go over the area multiple times if you are having difficulty cutting the plank deep enough.
- Fold back the plank along the line to snap it off.
- Use tin snips or shop scissors if you can't separate the pieces.
Pro Tip
If you need to install vinyl plank flooring around a toilet, we recommend removing the toilet completely. Later, you’ll cut angles in your VPF to fit the drain so the flooring lays flat underneath the toilet.
Step 6: Fit Your Final Planks and Reinstall Baseboards
Now that your floor is done, it’s time to finish up the room. First, you’ll want to reinstall the baseboards you had before or install some new ones. If you left that ¼-inch gap, this process should be easy. Fit your baseboard on the wall and recess the nail heads into the surface of the trim.
Final Vinyl Plank Flooring Installation Questions
How do I fill in gaps or seams between planks?
Filling in gaps and seams between your planks is as easy as finding a wood filler that matches the color of your planks and applying it to the gaps. Be sure to clean the seams before applying the wood filler and sand the area after you finish.
Do I need transition strips?
Yes, it’s best to install transition strips when installing vinyl plank flooring, especially if it will connect to different types of flooring in your home. Install transition strips after your vinyl flooring is completely finished.
How soon can you walk on vinyl plank flooring after installation?
How soon you can walk on your vinyl plank flooring depends on the method of installation. For floating vinyl, you can walk on your flooring right away after installation. If you installed vinyl planks by gluing them down, you must wait at least 48 hours before walking on it.
Show Off Your New Floors
Now that you’re an expert in laying vinyl plank flooring, it’s time to enjoy your space. With a new floor that's comfortable and durable, your newly refreshed room is ready for any guest, whether it be family or four-legged friends. Plus, what’s more rewarding than telling admirers that you installed this flooring all on your own?
Interested in other projects that will transform your space? See how our other home renovation projects can give you the home makeover you’ve always dreamed of.
What Do You Think?
Are you installing vinyl flooring in your home? We want to hear about it. Head over to Twitter or Facebook,
and use #dumpstersblog to join the conversation.


