Remove Plaster and Lath Like a DIY Pro
Whether your plaster is damaged or you need to install insulation, our step-by-step process will help you modernize your home.
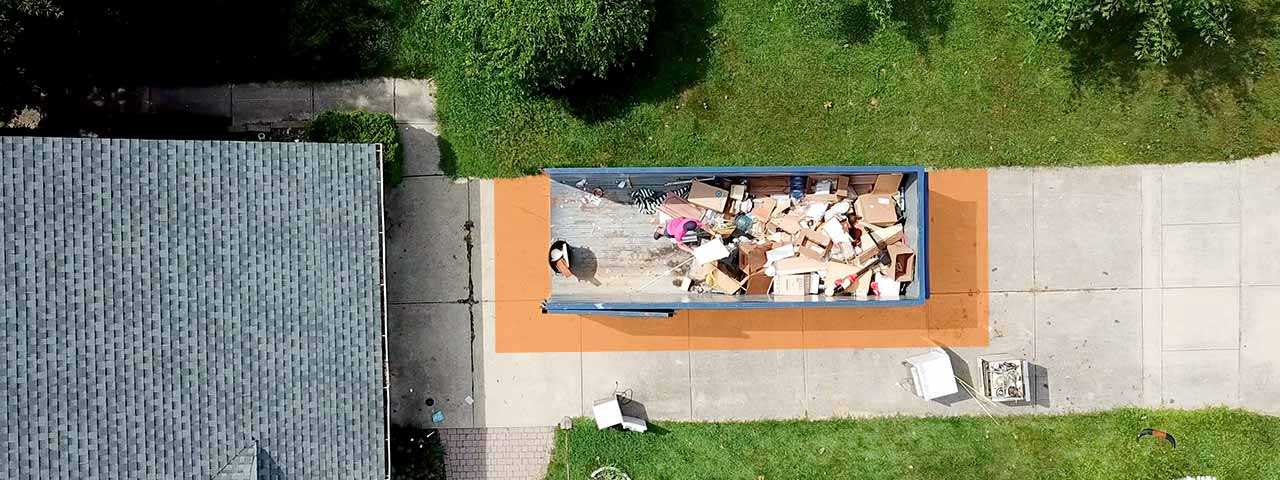
Make cleanup a breeze with a roll off dumpster:

Your Guide to Replacing Plaster with Drywall
Plaster walls became less popular after drywall availability exploded in the 1950s, but they’re still commonly found in older homes. You may want to get rid of crumbling plaster that hasn’t held up as your home settles, or maybe you need to install new electrical wiring or insulation. In any case, removing plaster is easy with the right tools and enough time.
Note that if your home is historical, you should consider repairing the plaster instead of tearing it down. If you decide to replace the plaster with drywall, be sure to get permission from local organizations as you would when making any major change to a historic home.
FAQs for Plaster Walls
Should I rent a dumpster when removing a plaster wall?
A roll off dumpster will simplify the debris removal process when you're tearing down a plaster wall. It will also help keep your workspace safe and tidy.
Ready to get a dumpster? Place your order online today.
When should I call a professional?
If you don't have the time or strength to remove lath and plaster yourself, consider hiring a professional. Contractors can get the job done quickly and thoroughly. Plus, they can check for asbestos and lead in the walls and paint. If you decide to check yourself, you can buy a lead testing kit at your local home improvement store or online.
How much does it cost to remove plaster walls?
The cost of professional plaster wall removal and replacement with drywall typically ranges from $1.60 to $3.80 per square foot. You’ll also need to factor in the costs of materials and disposal, which vary by location.
Do I need to check for lead or asbestos in lath and plaster?
Lead-based paints weren’t banned for residential use until 1978. If your home was built before then, it's likely there may be layers of lead-based paint on top of your plaster or beneath your asbestos, which are both known to be toxic.
Although professional testing can be costly, you can purchase testing kits for lead and asbestos at your local home improvement store to test yourself. It’s recommended to buy a few kits so you can test twice per area for the most accurate results.
Is it safe to remove old plaster walls?
If you had your walls tested for hazardous materials like lead paint, it should be safe to remove your plaster walls. Plaster walls themselves are not hazardous to remove as long as you're wearing the appropriate safety gear.
Are lath and plaster walls load bearing?
No, lath and plaster walls are rarely used as load bearing walls. There are exceptions to this rule, so it's best to make sure before you start working.
Order a Dumpster Online
Shopping after hours? Too busy to make another call? Book the dumpster you need, when you need it. Order your dumpster online 24/7.
How to Remove Old Plaster Walls in 5 Steps
Once you’ve decided to replace your plaster walls, you’ll need to identify the wall studs, scrape away the plaster, pry off the lath and remove your debris to clear the way for drywall installation. We’ll break it down step-by-step.
1. Prepare to Remove Plaster Walls
Before you start, make sure that you have enough energy or extra hands to finish this job. Removing plaster can take hours of work and cleanup. Have multiple people work with you if you're looking to get the job done all at once.
To get the space ready, you’ll need to remove all the furniture from the room and store it. If the room is large enough, you can move heavy items to the center and cover them with an old sheet or tarp to protect them from debris.
Next, remove light fixtures, electrical plates and anything else that might be installed in the wall, such as hooks, shelving or television mounts.

Gather Tools
Once the room is clear, it’s time to get all the necessary supplies. Take a quick trip to your local home improvement store to find the items listed below.
Tool and Supply List
Tools | Supplies |
|---|---|
Hammer | Goggles |
Broom and dustpan | Respirator |
Pry bar | Close-toed shoes |
Shovel (preferably flat) | Work clothes |
Need a dumpster to handle the mess?
Get a Price and Place Your Order Give Us a Call to Learn More
Plan for Debris Disposal
Before you start, it's important to know what you plan to do with the dust and debris that will accumulate from the job. Decide on the best removal option for your project's waste with our disposal guides.
Use Safety Precautions
The main safety concern of this project is dust from the plaster and interior of the wall; this is a very dusty and dirty job that will create a mess. Everyone in the room should wear a respirator and appropriate safety gear at all times. Also, use heavy tools with caution.

2. Remove the Plaster
It might be tempting to swing a sledgehammer at the wall, but if you’re trying to keep the framework intact, you’ll want to err on the side of caution and be a little more delicate.
Find the Studs
Listen for the wall studs — the vertical wooden beams in the wall — by lightly knocking on the wall with a hammer. If the tapping sound is solid, then you're approaching a stud. If it sounds hollow, you are moving away from a stud. Then, use the hammer to poke holes in the parts of the plaster that aren’t supported by studs. If you’re having trouble listening for studs, you can buy a wall scanner to make your work easier.
Scrape off the Plaster
Use a shovel to scrape off chunks of plaster. Some plaster might stick to the lath, but try to expose as much of the wood framework as possible. Make sure not to destroy the lath during this step. You’ll want to take apart the plaster and lath separately for easier cleanup.
If your wall contains horsehair plaster, it’s likely very old so the wall could crumble easily. Be careful because this will likely result in a messier cleanup.
Remove the Remaining Plaster
Get rid of any stuck chunks of plaster by knocking them free of the lath with a hammer or scraping tool.
Pro Tip
If you’re working on this step with multiple people, give plenty of space between one another to safely use the hammer. You can also use a putty knife to break off the remaining plaster.

3. Remove the Lath
With the plaster out of the way, you can now remove the lath that was supporting it. Start with the horizontal strips and use a hammer or pry bar to break and remove pieces of lath.
Make sure to wear gloves during this stage to protect your hands from loose nails or wood splinters. Also, be mindful not to remove or damage the studs. Even if the wall isn’t load-bearing, the studs should be preserved in order to act as a frame for insulation and drywall.
4. Clean Up the Debris
Next, get rid of any dust and dirt in the exposed wall, especially if you plan to install insulation. Some wall interiors are dirtier than others, depending on the age of the home and how it was built. A large broom and dustpan can work for the majority of your debris, but if your wall is especially dusty or if there are hard-to-reach spots, rent a shop vac to simplify the process.
Most areas won't accept remodeling debris as part of regular trash pickup. Fill a wheelbarrow or large garbage bin with loose materials as you work to keep your space clean, then load them in a roll off dumpster.


5. Prep for Drywall
To get ready for drywall installation, you need to check that your studs aren’t damaged or bent. Use a straight edge to ensure the walls aren’t more than a quarter-inch out of alignment, then re-nail or replace the studs before adding drywall.
What to Do After the Plaster Is Gone
Now that your old plaster is removed, it’s time to take the next steps to modernize your home. You might need to hire an electrician to rewire your old fixtures or install new insulation before putting up fresh drywall. Whatever project is coming up on your to-do list, we’re here to help you clear the way for what’s next.
What Do You Think?
Tearing down old walls? We're listening. Head over to Twitter or Facebook,
and use #dumpstersblog to join the conversation.


