How to Remove a Porch From Roof to Foundation
Tear out your old porch with the help of our guide, whether you want to save money or enhance DIY skills.
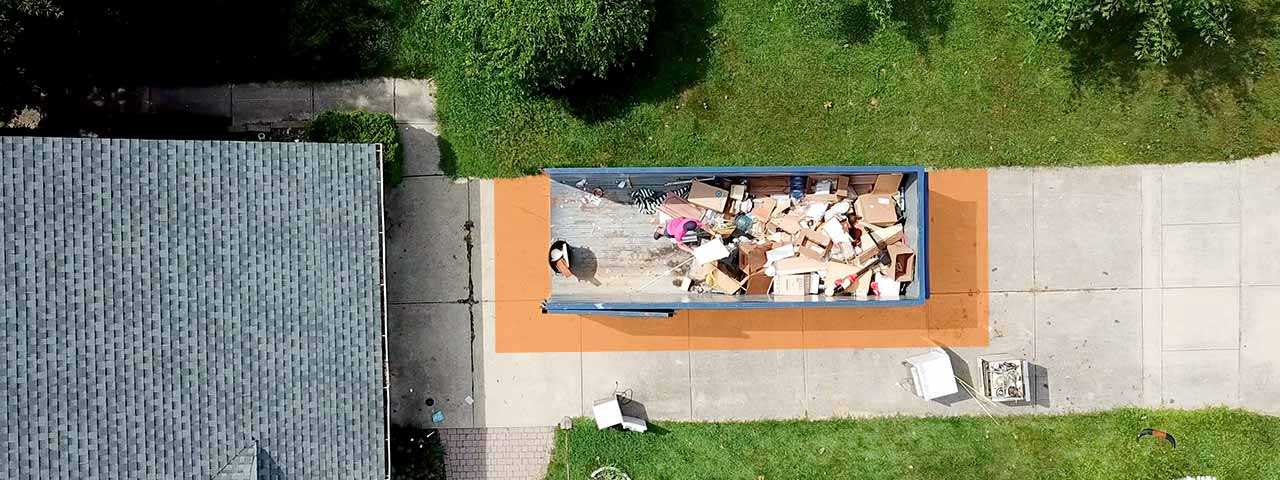
Make cleanup a breeze with a roll off dumpster:

Your Guide to DIY Porch Removal
Whether your porch is simply outdated or rotten and falling apart, it may be time for a complete porch removal. This guide will help you work from the top down, starting with the roof of your porch, then the columns or screened areas and finally the floor and foundation. Some porch designs are simpler than others, so you might find that you can skip a step or two. Nevertheless, tearing out your porch is a multi-day project that will pay off for your home.
Porch Removal FAQs
Would a dumpster help me remove a porch?
There's a lot of heavy debris that comes from porch removals. From cement chunks to lumber scraps, renting a roll off dumpster allows you to clear your workspace with ease, keeping the area clear and safe.
Think you need a dumpster? Place your order online today.
When should I hire professional help?
If you’re unsure about your DIY expertise, the equipment you have on hand or the complexity of your porch, hiring professionals can be helpful and time-saving. In particular, if your porch has glass walls, multi-season features or lots of electrical elements, you should consider consulting with a contractor.
How much does it cost to remove a front porch?
Hiring professionals to remove your porch can vary widely in price, but will generally cost around $750, even for the removal of a simple wooden porch. To save money, you only need to gather some basic tools and safety equipment, then rent a dumpster for convenient waste disposal as you work.
In comparison, a dumpster rental may save you over half of what it costs to hire a professional and our agreements come with a generous rental period to get the job done on your timeline.
How long should I plan to work on a DIY porch removal?
The time your porch removal takes depends on the size and type of porch you have. If it’s only made of a simple roof and wooden beams, including the foundation, you might completely remove it over a weekend. Expect a full week of work if your porch has a brick foundation that needs to be chiseled apart, or if you want to keep the parts of your dismantled porch as undamaged as possible.
Do I need a permit to remove my porch?
It depends on your location and how big the porch is. In most cases, a permit isn't necessary if the porch is small. However, larger porches often require a permit. Also, permitted work varies from government to government. It's best to check out your city's website to find out more details before you start tearing out your porch.
Order a Dumpster Online
Shopping after hours? Too busy to make another call? Book the dumpster you need, when you need it. Order your dumpster online 24/7.
How to Tear Down a Porch in 5 Steps
This guide is for a basic front porch with a roof, columns, flooring and support. If your porch matches this design, let’s move on with the first steps of your DIY porch removal.
1. Learn the Parts of a Porch
There are a lot of terms that may be unfamiliar to you when it comes to the anatomy of a porch. Don't worry — we've got you covered. We created infographics that break down the parts of a porch and shows you where they are. So, you'll know your joists from your footers and everything in between.
Elements of Your Porch Roof
From shingles to joists and flashing, it's important to know these details about your porch roof before getting started.

Diagram of Porch Foundation
For safe demolition, be sure to know the framework of your porch from the footings and joists to basic handrails and spindles.

2. Gather Tools and Prep the Area
Below is all of the equipment you’ll need to remove the porch yourself. Bear in mind that you can borrow or rent some of these tools if you don’t have them on hand and don’t want to buy them.
Porch Removal Tool and Supply List
Tools | Supplies |
|---|---|
Ladder | Safety goggles |
Screwdriver | Hard hat |
Circular saw | Gloves |
Hammer | Knee pads |
Sledgehammer | |
Shovel | |
Mallet |
Need a dumpster to handle the mess?
Get a Price and Place Your Order Give Us a Call to Learn More
How to Prepare for a Porch Demolition
- Disconnect the electricity from your porch. Some porches might not have any electrical wiring, but many have lights or fans. Once the electricity is disconnected, you can safely take down these fixtures and either save them or toss them.
- Remove any furniture or potted plants from your porch. Nothing should be in your way as you take the roof apart.
- Gather the tools and safety equipment you need in one place.
- Be sure to wear goggles and a hard hat as you begin dismantling your porch.
DIY porch removal will leave you with lots of debris, including shingles and floorboards. You can rent a dumpster for your project location to easily toss trash as you work.
Keep in Mind
There are lots of ways to get rid of the spare lumber that you'll accumulate. We've got you covered there, too.
Check out our lumber disposal guide to learn all the ways you can get rid of the debris.

3. How to Remove a Porch Roof
Now that you've got the porch prepped and your tools handy, it's time to get to work. Start with the roof. No roof? Congratulations, you've completed this step. Otherwise, we're going to hop right in with the shingles.
Safety Tip
If your porch is rotting, be sure to check its stability before you begin working to avoid an unexpected collapse. Everyone around the porch during this job should wear safety gear and stay aware of any unstable areas.
1. Remove the Shingles
Use a ladder to access the roof and a shovel to dislodge the shingles. You should also peel the flashing away from where your porch roof connects to your home. Just remember — shingle weight can add up quickly!
2. Saw Through the Joists and Rafters
Joists are the horizontal beams connecting the porch roof to the home, and rafters are slanted beams that form the frame. If your porch roof is flat, then it only has joists, usually supported by trusses.
If you want to avoid buying or renting an electric saw, you can start by removing the nails on these beams with a hammer. Once you’ve done that, you should be able to pull the beams off the porch frame or knock them off with a sledgehammer. Even if some nails can’t be removed, the sledgehammer will take care of the frame.
If the nails can’t be pulled out, use a circular saw to cut through each beam as close to the house as possible. Stand under the roof to cut through the beams and joists. Remember to wear a hard hat to protect your head if wood or shingles begin to fall.
3. Separate the Remaining Roof From the House
Use a circular power saw to cut the roof deck into sections that can be ripped off by hand. Keep in mind that as you take pieces off, the roof will become more and more unstable. Be sure to stand outside the perimeter of the roof while doing this step.

4. Remove the Floor
With the roof gone, you've got a two-part step next: removing things attached to the porch floor and removing the floor deck itself. Luckily, both parts are pretty straightforward as there's no weight pushing down on them to cause problems.
1. Tear Out Screens
If your porch was screened in, it's time to get rid of what's left. Use the claw side of your hammer or a power drill to remove any staples, nails or screws holding up the screen. Then, simply take the screen off your porch.
2. Take Down Railings
There are two ways to do this. If you want to save the wood, you'll need to use a hammer to remove any nails connecting the spindles and rails to the columns or posts. If you're planning on scrapping the lumber, take your circular saw and cut the columns and posts as close to the porch deck as possible. If you choose this route, you can skip step 3 as the posts and columns will already be gone.
3. Remove Porch Columns
Pull out the nails connecting the columns to the floor. Knock the columns down with a sledgehammer if you need to, or pull them free with your hands if you want to preserve the columns for a future project.
If your columns are made of stone, consider hiring a professional to complete the removal.
4. Saw Through the Floorboards
Use a circular saw to cut the boards down the middle into smaller pieces. You should set the length of your circular saw to avoid cutting through the supports under the floorboards for now. Also, be careful not to grind the saw against any brick or concrete around the boards. If you’re throwing out the boards, make sure to cut them into small enough pieces so that they won’t hang over the sides of a dumpster as you get rid of them.
5. Pry Off the Boards
Wear knee pads for comfort and use a pry bar in the sawed-out areas to rip out the boards. Use a hammer as necessary to remove any nails in the way. If the nails are stubborn or you’re working at a difficult angle, wedge a pry bar under the boards and hit the pry bar with a mallet to remove it.

5. Remove the Supports
The type of porch you have will affect how long this part takes. Some porches are only made of wooden supports and a lattice cover, while others could be supported by cinderblocks or bricks, which take a bit more heavy lifting. Please note: The steps below outline how to remove supports from a wooden deck. We detail how to remove a concrete foundation below these steps.
If your porch foundation is in good condition and you plan to build a new porch on it, you can skip this step.
1. Remove the Steps
If your porch had any steps, you'll want to remove them now. Simply pull out any nails attaching the steps to the porch frame. Then remove the steps and put them aside or in your dumpster.
2. Take Out the Porch Floor Frame
If all has gone well, you should have a bunch of sides and joists attached to the footing posts remaining. Start with disconnecting the joists from each other by removing nails and screws with your hammer or screwdriver. If you want to reuse the lumber, take them off one at a time. If you're getting rid of the wood, feel free to leave them attached to the sides and take off chunks at a time.
Once the joists are detached, it's time to take the sides off. Simply use your hammer to remove the remaining lumber and lattice that form your frame.
3. Dig Out Post Footings
Use a shovel to dig away dirt or grass to reveal the full length of the posts and the concrete footing supporting them. Then, simply pull out the exposed posts.
How to Remove a Concrete Foundation
If your porch was supported by a concrete slab, you may want to have a professional come in and remove it, or if you have a pry bar and bolt cutters on hand, you can take care of it using these basic steps:
- Choose a starting point, such as an area with deep cracks.
- Break apart the slab using a sledgehammer and pry bar.
- Cut any mesh you find using bolt cutters.
Make sure to consult our DIY guide on removing concrete patios for more helpful information.
After Removing Your Porch, What’s Next?
With the new space in front of your home, you have plenty of options. You could set up a garden to keep your home green, or you can hire professionals to install a beautiful new porch. The choice is up to you now that you’ve cleared the way for what’s next.
What Do You Think?
Are you tearing down your porch? We're listening. Head over to Twitter or Facebook,
and use #dumpstersblog to join the conversation.