How to Completely Tear Down a Fence
Is your fence an eye-sore? Whether you're looking to replace or get rid of it, save money by tearing it down yourself.
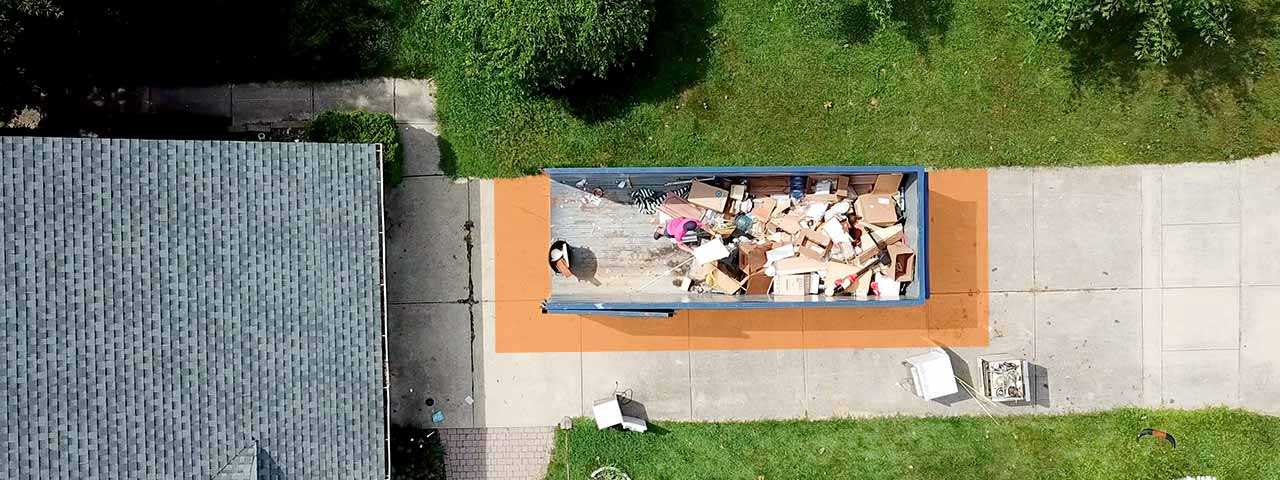
Make cleanup a breeze with a roll off dumpster:

Fence Removal: Your DIY Guide
There are plenty of reasons to get rid of an old fence. Maybe it’s leaning with age or missing panels after a storm. Perhaps you got a new puppy and need a fence with pickets closer together. Whatever the reason, tearing down a fence is a fairly straightforward project.
Fence Removal FAQs
How much does fence removal cost?
DIY fence removal can be as cheap as getting a permit from your local government. However, if you choose to have a professional take care of the job, expect to pay $1-2 per foot of fence.
What’s the best way to dispose of a fence?
Renting a dumpster is an ideal way to dispose of your fence once you’ve pulled it out of the ground. Just toss all the panels, gates and posts in, and let us haul it away. Plus, most municipal curbside collection services will not accept construction materials or may require the wood to be cut to certain lengths.
Think you need a dumpster? Place your order online today.
Is it hard to remove a fence?
Removing a fence requires hard work and heavy lifting, including the tools needed to get the job done. Although this project isn't for the beginner DIYer, a homeowner can remove the fence without a contractor. Just be aware that it'll take a lot of strength and maneuverability.
If you don't think you are up for the task, hire a professional.
Order a Dumpster Online
Shopping after hours? Too busy to make another call? Book the dumpster you need, when you need it. Order your dumpster online 24/7.
4 Steps: How to Tear Down a Fence
On the surface, removing a fence can feel like a huge undertaking, particularly if the fence wraps around a large property with a lot of posts separating the panels. However, it really isn’t too hard of a task to accomplish if you have the time and strength to do it.
Our guide walks you through it step-by-step so you can tear down your fence with confidence. Luckily, if your fence is vinyl, the steps are fairly similar and we’ll note any differences you need to know.
1. Fence Removal Prep
There are a couple things to do before you start the physical work.
Make Calls
Before you power up your saw and start making a mess, there are a few calls you need to make. By making these calls, you’ll ensure that you won’t run into any serious issues or project delays.
- Utility companies: You need to know if any utility lines run under or near the fence before you start digging. Luckily, all you have to do is dial 811 to set up a survey and have someone flag all the lines in your work space.
- Local government: You may need to submit your plans to your city for approval. It’s also worth noting that some municipalities may require you to get a permit to tear out a fence. Plus, if there are any questions about if the fence is on your property, your local government can help sort it out.
- Your neighbors: It’s a good idea to clue your neighbors in about your plans. They may need to make changes to their yard space if they use the fence as well. Plus, you may even get an extra pair of hands to help with the project.
Gather Tools
While there are tools you can rent from a home improvement store, you really can tackle fence removal with the supplies found in your basic toolbox.
Fence Removal Tool and Supply List
Tools | Supplies |
|---|---|
Pry bar | Gloves |
Hammer | Goggles |
Screwdriver | Spare 2x4s* |
Reciprocating or Hand saw | Spare cinder blocks* |
Step ladder | Chain with grab hook* |
Shovel | Car jack* |
Before you get much further, it’s worth considering how you want to get rid of the old fence materials. Most bulk curbside collection companies will only accept a specific amount of waste at one time. Plus, they often have restrictions on how large the pieces of wood can be.
To get rid of the old fence quickly, consider renting a dumpster. With a range of roll off container sizes, you can find one that fits comfortably in your driveway, making it easy to toss everything as you work.
Need a dumpster to handle the mess?
Get a Price and Place Your Order Give Us a Call to Learn More
Pro Tip
If your yard is a bit overgrown and you need to clear some brush before removing the fence, we also offer yard waste dumpsters that make green waste removal a breeze.
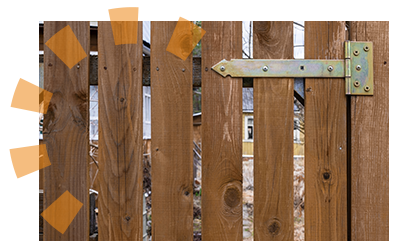
2. Dismantle Fence Gates
It’s time to get to work. The best place to start is with the gates.
- Take a screwdriver and unscrew the hinges from the gate posts.
- Lift away the gate and carry it to the dumpster.
- Unscrew any remaining hardware from the fence post.
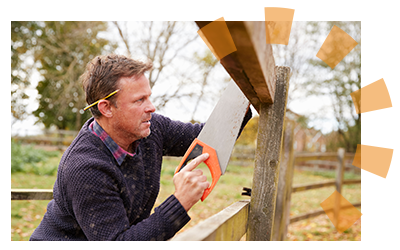
3. Remove Fence Panels
Once you have removed all the gates, switch to the panels. You can simply cut them off by the posts if you don’t care about keeping the fence panels intact. Don't use the saw method with vinyl fences because there may be metal underneath the panels. Instead, unscrew the brackets from the posts and lift the panels away.
- Cut the rails with a reciprocating saw or hand saw as close to the post as possible.
- Saw or break the fence panels into small, manageable sections if needed.
- Carry each panel to the dumpster as you work.
If you’re hoping to reuse or repurpose the wood, you’ll want to remove the fence panel-by-panel. While a bit more time-consuming and labor-intensive, the damage-free option is still quite easy to accomplish. Grab your pry bar, hammer and screwdriver.
- Find where the rails are attached to the post.
- Unfasten the rails from the posts. If they are attached with screws, just unscrew them. If nails were used, you may need to pry the rail loose with a pry bar before using your hammer to completely detach them.
- Remove the panels from your work space and store them safely.
Cleanup Tip
Use our lumber disposal guide for helpful tips on how to properly dispose of wood scraps, whether you're looking to reuse, recycle or simply toss them.
4. Pull Out the Fence Posts
With just the posts remaining, you’ve gotten a bulk of the project out of the way. However, this is where the hardest work comes into play. Fence posts are typically cemented into the ground. While this is great because it gives them lasting sturdiness and durability, it can be problematic when you need to remove the posts.

How to Remove a Non-Cemented Fence Post
If you’re fortunate, the posts will not be cemented into the ground. You can find this out simply enough.
- Grab a post and try to wiggle it.
- Keep wiggling if it’s clearly gaining movement until you are able to push it about an inch in each direction.
- Pull the fence post straight up.
If the post is not cemented, it should easily come out. If it stays in, you’ll need to try one of the following methods.
How to Remove a Fence Post With Concrete Footing
There are a lot of methods to tear out fence posts with concrete, but it really comes down to what tools you have available to get the job done. Read through our top-three methods to see which option sounds the most appealing to you.
Pro Tip
It’s more than possible to remove your fence posts without spending any money. However, there are plenty of post removal tools — such as a t-post puller — available for rent at your local home improvement store that will make the job easier.

Option 1: Use a Car Jack
For this method, you’ll need to get your shovel, a chain and high-lift car jack.
- Dig around the post so that 3-4 inches of concrete is exposed. You may need to dig over six inches for this to happen.
- Wrap your chain around the exposed concrete so it doesn't slip off. You can use a slip hook to latch the chain to itself or wrap the concrete a few times, then pass the chain under itself upward from the bottom.
- Place your jack next to the post and wrap the other end of the chain around it, using the grab hook to lock it in place.
- Pump the jack lever until the post and cement footing have been removed from the ground.

Option 2: Create a Lever
If you don’t have a car jack, creating a lever is another simple concrete post removal method that can be done with some spare 2x4s and a couple cinder blocks.
- Take a pair of 2x4s that are about a foot long. Stagger them so that one sticks up about 5-6 inches above the other.
- Fasten the 2x4s to the post with the higher piece against the post.
- Place a cinder block 12-18 inches away from the post.
- Grab a 6–8-foot long 2x4 and slide one end into the notch you created when you fastened the shorter boards to the post. Be sure the 2x4 rests on the cinder block.
- Push down on the 2x4 on the other side of the cinder block, which will in turn push the post up and out of the ground.

Option 3: Dig and Push
You’ll have to do a lot of manual labor for this method, but it’s a great way to remove cemented posts if you don’t have a car jack or the materials needed to create a lever.
- Dig around the post until you see the full circumference of the cement footing.
- Pick a side and dig down six inches.
- Push on all sides of the post to loosen it.
- Attempt to pull it up or completely push it over.
- Dig another six inches down on the same side you previously picked. Then, push it and try to remove it. Repeat until the post is removed from the ground.
Pro Tip
Be sure to check if concrete is allowed in your dumpster. If it is, keep in mind that the weight of cement adds up fast.
Say Hello to Your Wide-Open Yard
The fence is gone, but what’s next? If you’re hoping to replace the fence, you still have a footprint ready to guide your project. Are your fence days over? Be sure to fill in the post holes with a bit of dirt and plant some new grass. Either way, a new adventure awaits in your own backyard.
What Do You Think?
Did you tear out your fence? We're listening. Head over to Twitter or Facebook,
and use #dumpstersblog to join the conversation.